18 May
Unity UIToolkit as the best inspector editor tool
min. read
What I will take from this tutorial?
Today I will explain how we can achieve the functionality of a tool like Odin Inspector while having simple readable, and extendable code. I think every programmer should know ins and outs of custom editor tools like that! We will do that using UIToolkit, a way powerful alternative to an old GUI system for editor.

What is UIToolkit?
UIToolkit, a UI framework in Unity, empowers programmers to craft interactive and visually appealing UI elements. Built on UIElements technology, UIToolkit offers a scripting API and extensive controls, facilitating the development of customized layouts, animations, and interactions that elevate user experience and contribute to project success.
Custom editor tool?
Since its inception, UIToolkit was designed as mostly editor tools, that were later transformed into a tool for gameplay. But its rollout was very slow. Only recently in Unity version 2022, Unity Team added a possibility to overwrite parts of Unity Editor, like hierarchy window, project view, or top menu bar and toolbar.
Let’s start with UIToolkit using VisualElements!
This tutorial is targeted toward more advanced users so I will skip some obvious parts like creating a new project and opening Visual Studio code 🙂
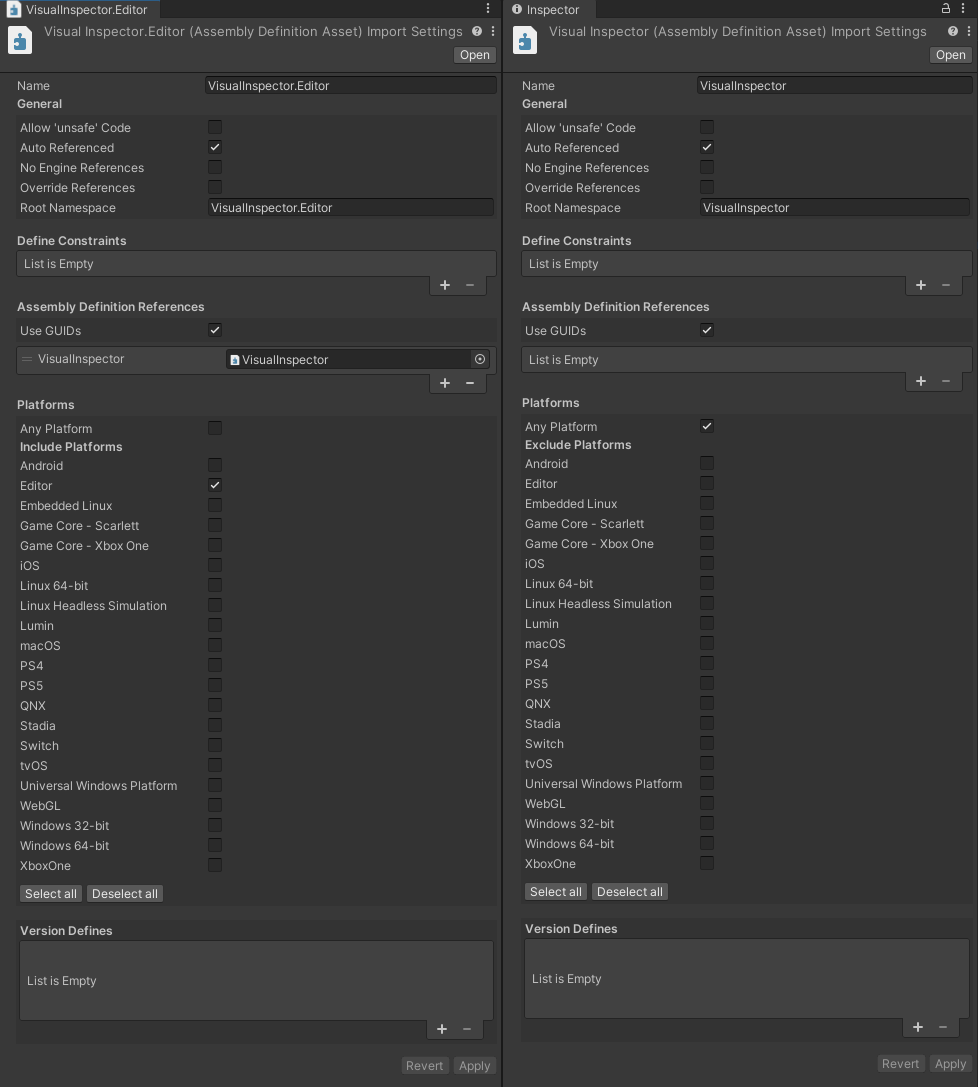
I will mention that it’s a good practice to create 2 new folders. One for Editor and one for Runtime. This will be important because we would save ourselves from adding preprocessors like `#if UNITYEDITOR`. Create a new asmdef in each folder and for Editor one disable everything except Editor.
The first line of code
This is a fundamental object that we want to create as an entry point for our Inspector. `CustomMonoBehaviourInspector.cs` in Editor tools.
[CustomEditor(typeof(MonoBehaviour), true, isFallback = true)]
public class CustomMonoBehaviourInspector : UnityEditor.Editor
{
    public virtual void OnEnable()
    {
        // Intitialize Editor
    }

    public virtual void OnDisable()
    {
        // Dispose unused data
    }

    public override VisualElement CreateInspectorGUI()
    {
        // Main editor code goes here
    }
}
This global tool affects all MonoBehaviour types including built-in types! As we will develop the tool we might include those as well, but right now we want to exclude that.
public override VisualElement CreateInspectorGUI()
{
    if (target.GetType().Assembly.FullName.Contains("Unity"))
        return base.CreateInspectorGUI();
    // ...
}
Custom editor tools
After that, we want to create a new root of our inspector and populate it with existing types that we don’t want to overwrite just yet. In this tutorial, we will not touch on how you can adjust nested types or more multi-object editing, as this is non-trivial task. And it would take too long in this tutorial, but we can start and you can expand from there! The easiest way to add existing types to Inspector GUI is for example
new IMGUIContainer(() => base.OnInspectorGUI());UIToolkit advantage is that we don’t have to think about low-level stuff like mouse position, GUI layouts, or other functions. Everything is handled by the tool! Even with casting this to IMGUIContainer, we are limiting ourselves with ability to edit those tools, but it’s simple enough for our usecase now!
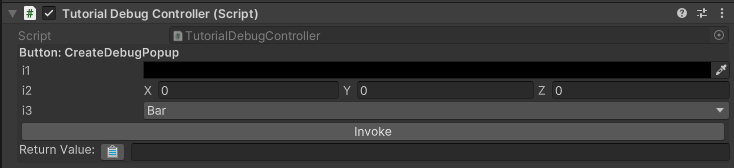
Drawing custom components
The whole idea of easy-to-use Inspector tools is custom attributes. Unity editor provides by default a bunch of attributes like `Range`, `SerializeField`, `RequireComponent` and so on. But limited in nature are usually not enough.
Let’s create an attribute that we can use to handles class. Keep in mind that this part should be part of Runtime and not Editor assembly.
// Default class for easier finding overwrites
public abstract class VisualAttribute : Attribute {  }

// Example classes
[AttributeUsage(AttributeTargets.Method, Inherited = true, AllowMultiple = false)]
public class ButtonAttribute : VisualAttribute {  }

public class ReadOnlyAttribute : VisualAttribute {  }

public class ShowInInspectorAttribute : VisualAttribute {  }
Additionally you can add values to the attributes to extend their functionalities with custom methods and functions.
We still are missing one function to implement. The actual drawing.
Custom drawer objects
First, let’s target our attribute method with a new class that will help us focus on the specific components attached to our custom editor tools.
/// <summary>
///     A information for <see cref="VisualDrawer"/> what attributes it should target for drawing custom inspector.
/// </summary>
public class VisualDrawerTargetAttribute : Attribute
{
    public VisualDrawerTargetAttribute(Type targetType)
    {
        TargetType = targetType;
    }

    public Type TargetType { get; }
}
To the implementation
We can leverage a pretty simple API of UIToolkit to for example create a Read Only field. Please ignore InspectorData and VisualDrawer for now, we will create this classes later on. For now, just remember that this is our container for overwriting data.
/// <summary>
///     Makes the field read-only in the inspector.
/// </summary>
[VisualDrawerTarget(typeof(ReadOnlyAttribute))]
public class ReadOnlyDrawer : VisualDrawer
{
    public override VisualElement CreateInspectorGUI(InspectorData inspectorData)
    {
        TargetVisualElement?.SetEnabled(false);
        return null;
    }
}
And that’s it! With clever structure we created a simple ReadOnly drawer that we can use like this in our code MonoBehaviour and Game Object! This method has no effect on gameobject’s functionality but only on inspector drawing.
[ReadOnly]
public string Icon = "my/icon/readonly/path"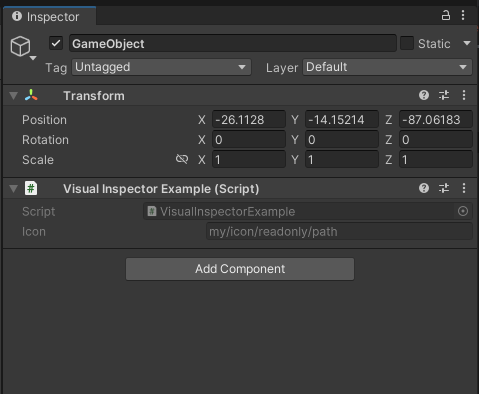
Core implement
We need to backtrack a little bit to fill in the missing bits of the code. This is not enough to beautify our Game object yet. We need to initialize a core component to create out custom editor tools. This is a basic tool that will allow us to overwrite the most important elements of our GUI.
public abstract class VisualDrawer : IDisposable
{
    private bool _isDisposed;

    public Object Target { get; set; }

    public MemberInfo MemberInfo { get; set; }

    public VisualAttribute Attribute { get; set; }

    public VisualElement TargetVisualElement { get; set; }

    public abstract VisualElement CreateInspectorGUI(InspectorData inspectorData);

    public virtual void OnEnable(){}

    public virtual void OnDisable(){}

    public virtual void OnDestroy(){}

    public void Dispose()
    {
        if (_isDisposed) return;
        OnDisable();
        OnDestroy();
        _isDisposed = true;
    }
}
InspectorData script
public class InspectorData
{
    public InspectorData(UnityEditor.Editor editor, Object target, VisualElement root)
    {
        var bindingFlags = BindingFlags.Public |
                            BindingFlags.NonPublic |
                            BindingFlags.Instance |
                            BindingFlags.Static |
                            BindingFlags.FlattenHierarchy |
                            BindingFlags.DeclaredOnly;
        var targetType = target.GetType();
        var baseTypes = new List<Type>();
        while (targetType != null)
        {
            baseTypes.Add(targetType);
            targetType = targetType.BaseType;
        }

        var methods = baseTypes.SelectMany(x => x
                .GetMethods(bindingFlags)).ToArray();
        var properties = baseTypes.SelectMany(x => x
                .GetProperties(bindingFlags)).ToArray();
        var fields = baseTypes.SelectMany(x => x
                .GetFields(bindingFlags)).ToArray();

        Editor = editor;
        Target = target;
        Properties = properties;
        Fields = fields;
        Methods = methods;
        Root = root;

        if(target == null)
            return;
        SerializedObject = new SerializedObject(target);
    }

    public PropertyInfo[] Properties { get; }

    public FieldInfo[] Fields { get; }

    public MethodInfo[] Methods { get; }

    public VisualElement Root { get; set; }

    public UnityEditor.Editor Editor { get; }

    public Object Target { get; }

    public SerializedObject SerializedObject { get; set; }
}
Explanation
Both VisualDrawer and InspectorData are scripts that groups our data into one place so that we can easily manipulate our UIToolkit with just a few lines of code. This is not full implementation but it should get you started.
InspectorData is responsible for keeping our class data, like Fields and Properties as well as our Target object and SerializedObject.
VisualDrawer is an entry point for custom editor tools. We can simply overwrite multiple components attached or just overwrite the whole editor.
Limitations
These custom tools have some limitations, we cannot create a scene view or scene tools like transform tool, access scene view, or some scene data. It’s possible but not part of this tutorial.
Finishing function
With all the pieces we can finally finalize the Inspector GUI implementation. Let’s add rest of the `CreateInspectorGUI` function in `CustomMonoBehavuiourInspector`. Full code
public override VisualElement CreateInspectorGUI()
{
    if (target.GetType().Assembly.FullName.Contains("Unity"))
        return base.CreateInspectorGUI();

    var root = new VisualElement();
    _inspectorData = new InspectorData(this, target, root);

    // Add script field
    var scriptField = new ObjectField("Script");
    scriptField.objectType = typeof(MonoScript);
    if (target is MonoBehaviour)
    {
        scriptField.value = MonoScript.FromMonoBehaviour((MonoBehaviour) target);
    }
    else
    {
        scriptField.value = MonoScript.FromScriptableObject((ScriptableObject) target);
    }
    scriptField.SetEnabled(false);
    root.Add(scriptField);

    var inspector = new IMGUIContainer(() => base.OnInspectorGUI());
    foreach (var element in inspector)
    {
        root.Add(element);
    }

    // Draw all custom inspector on fields
    foreach (var field in _inspectorData.Members)
    {
        if(field.Attributes == null)
            continue;
        foreach (var attribute in field.Attributes)
        {
            if (!TryGetVisualDrawer(attribute.GetType(), out var visualDrawer))
                continue;

            var visualElement = CreateVisualDrawer(visualDrawer, field.MemberInfo, attribute, root);
            root.Add(visualElement);
        }
    }
    return root;
}
Last of the features
We have yet to implement one method, that will assign our value to VisualDrawer
private VisualElement CreateVisualDrawer(VisualDrawer visualDrawer, MemberInfo memberInfo, Attribute attribute,
    VisualElement root)
{
    visualDrawer.Target = target;
    visualDrawer.MemberInfo = memberInfo;
    visualDrawer.Attribute = attribute as VisualAttribute;
    visualDrawer.TargetVisualElement = root.Q(memberInfo.Name);
    var visualElement = visualDrawer.CreateInspectorGUI(_inspectorData);
    _activeDrawers.Add(visualDrawer);
    visualDrawer.OnEnable();
    return visualElement;
}
and we are done! All defined classes are the most useful when implemented but I hope from here it will be easy for you to implement something yourself!

Unity Editor Window
Given this approach of editing classes with attributes, you can easily overwrite more than just Inspector. Custom window, custom log, custom menu, and many more. And the best thing is that the core can remain the same. Just simple few methods.
Final words on the project and custom tools
The whole project is Open Source at GitHub! We plan to improve this tool, by keeping the core Open Source and expanding functionalities as paid addons. We want to directly compete with Odin Inspector in the future but this is just part one of our journey!


About prog
Founded in 2016 in Warsaw, Poland. Prographers mission is to help the world put the sofware to work in new ways, through the delivery of custom tailored 3D and web applications to match the needs of the customers.
SIMILAR POSTS
8 Tools for 3D Rendering in a Web Browser
3D
Design
Programming
Web apps
min. read
Deploying Nginx as an API Gateway – Tips & Functionalities
Programming
Web apps
min. read
Let's talk
I agree that my data in this form will be sent to [email protected] and will be read by human beings. We will answer you as soon as possible. If you sent this form by mistake or want to remove your data, you can let us know by sending an email to [email protected]. We will never send you any spam or share your data with third parties.
I agree that my data in this form will be sent to [email protected] and will be read by human beings. We will answer you as soon as possible. If you sent this form by mistake or want to remove your data, you can let us know by sending an email to [email protected]. We will never send you any spam or share your data with third parties.